How to Remove One Tile to Replace with Another
May 20, 2024
How to Remove One Tile to Replace with Another
Are you dealing with a cracked or damaged tile and wondering how to replace it efficiently without professional help? Whether it's in your kitchen, bathroom, or any other area, replacing a tile is a manageable task that you can tackle on your own with the right guidance and tools. Below is a comprehensive guide that combines information from various sources to help you remove one tile and replace it with another seamlessly.
Step-by-Step Guide:
Step 1: Remove the Grout
- Use a grout saw or grout remover tool to scrape away the old grout surrounding the damaged tile1.
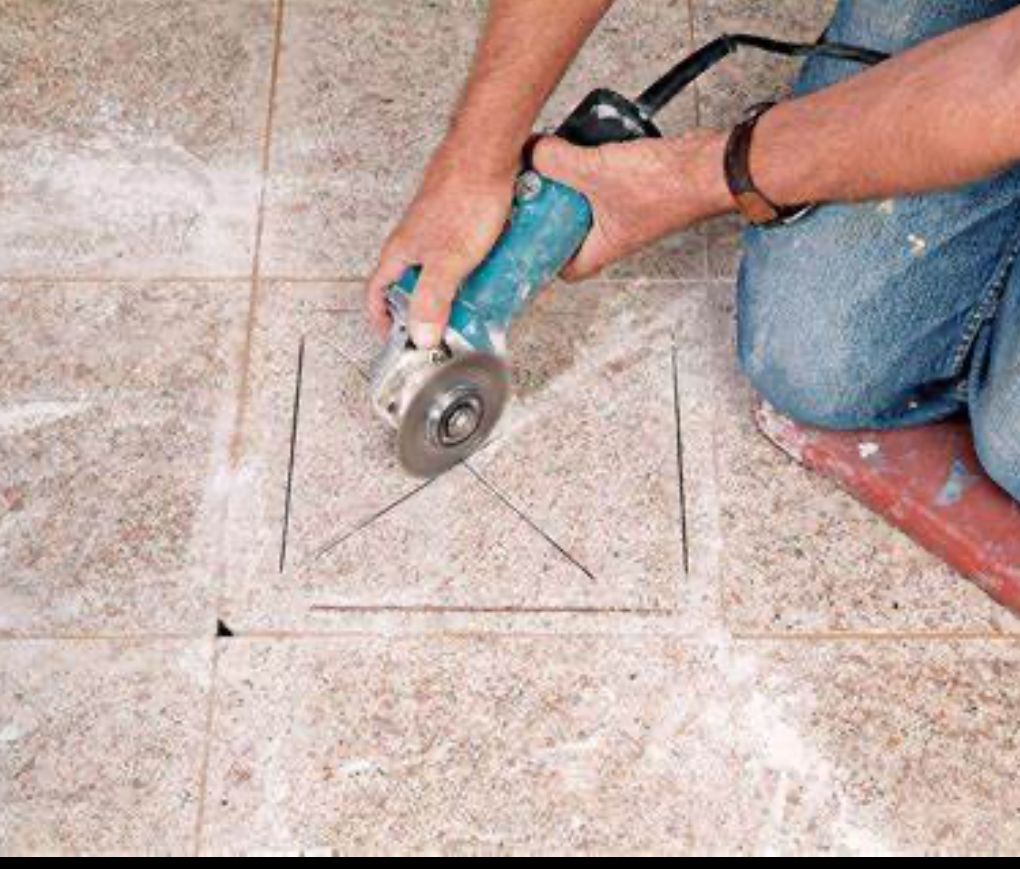
Step 2: Remove the Tile
- Put on safety gear like gloves and goggles.
- Use a hammer and chisel or an oscillating multi-tool to break up and remove the damaged tile.
- Be cautious not to damage adjacent tiles while removing the old tile2.
Step 3: Prepare the Surface
- Clean the area thoroughly and remove any debris or remaining adhesive.
- Check for levelness and ensure the surface is ready for the new tile.
Step 4: Apply Thin-Set
- Use a notched trowel to spread pre-mixed thin-set on the clean floor.
- Create even ridges for proper tile adhesion and prevent air pockets beneath the new tile1.
Step 5: Install the New Tile
- Place the new tile carefully, ensuring it is level and aligned with the surrounding tiles.
- Apply even pressure to set the tile and allow it to dry for at least 24 hours1.
Step 6: Grouting
- Once the thin-set is dry, apply grout with a rubber float, filling the joints evenly and diagonally to prevent excess grout buildup.
- Clean off excess grout using a damp sponge and wait for the grout to set as per the instructions.
Final Touches
- Buff the surface of the tile with a microfiber cloth to remove any grout residue.
- Seal the grout to protect it and complete the replacement process2.
By following these steps and recommendations, you can successfully remove one tile and replace it with a new one, giving your space a fresh and polished look. Remember to exercise caution, use the right tools, and take your time to ensure a professional finish.
Happy tiling!

The Benefits of Tile and Grout Cleaning/Restoration and Bathtub Refinishing During a Recession
Factors Affecting the Cost of Saltillo Refinishing in Midland/Odessa, Texas
The Benefits Of A Grout Colored Sealer
The Art of Bathtub Transformation Through Refinishing
Professional House Cleaning Services in Midland and Odessa, Texas
How to Test for a Leaky Shower Pan
How a House Cleaner Can Actually Make Your Tile and Grout Dirtier
The Best Tile and Grout Cleaning Products: A Comprehensive Guide
Does Your Shower Repair Need a Plumber?
The Importance of Hiring a Tile and Grout Cleaning Company for Floor Maintenance